Are your IAM policies too permissive? Are all of your users using an MFA device? Did you accidentally make a critical RDS database available on the wide-open internet?
You could spend time combing through every screen of the AWS interface checking for misconfigured resources, or you could let software do it for you.
That’s where ScoutSuite comes in. It’s one of a handful of tools that can automatically detect vulnerabilities in your AWS environment so you can correct them and potentially prevent bad things from happening. It’s easy to set up, easy to run, and the results are easy to digest. Here’s how to get started:
1. Set up a Read-Only IAM User for Use With ScoutSuite
Log into your AWS environment, go to IAM, and create a new user. For permissions, you’ll want to assign the SecurityAudit and ViewOnlyAccess policies. ScoutSuite provides an example policy you can use, but I’ve found these two AWS-managed policies work just as well. After you’ve created the user, you’ll need to create an access key for Command Line Interface (CLI) use. Copy the access key ID and secret, as we’ll need them to run the scan later.
2. Install ScoutSuite
You can do this a couple of different ways, but the easiest I found was using Homebrew. Run brew install scoutsuite to get up and running.
3. Scan It!
This is the easy part. Run the command below, but replace ACCESS_KEY_ID and SECRET_KEY with the values you copied in step 1. You can also customize the values for report-dir and report-name.
scout aws --report-dir ./aws-scan-2023-12-18 --report-name aws-report-2023-12-18 --result-format json --access-key-id ACCESS_KEY_ID --secret-access-key SECRET_KEY`
If entering credentials as command line arguments gives you the heebies, you can opt to set up an AWS credentials file.
4. Review the Report
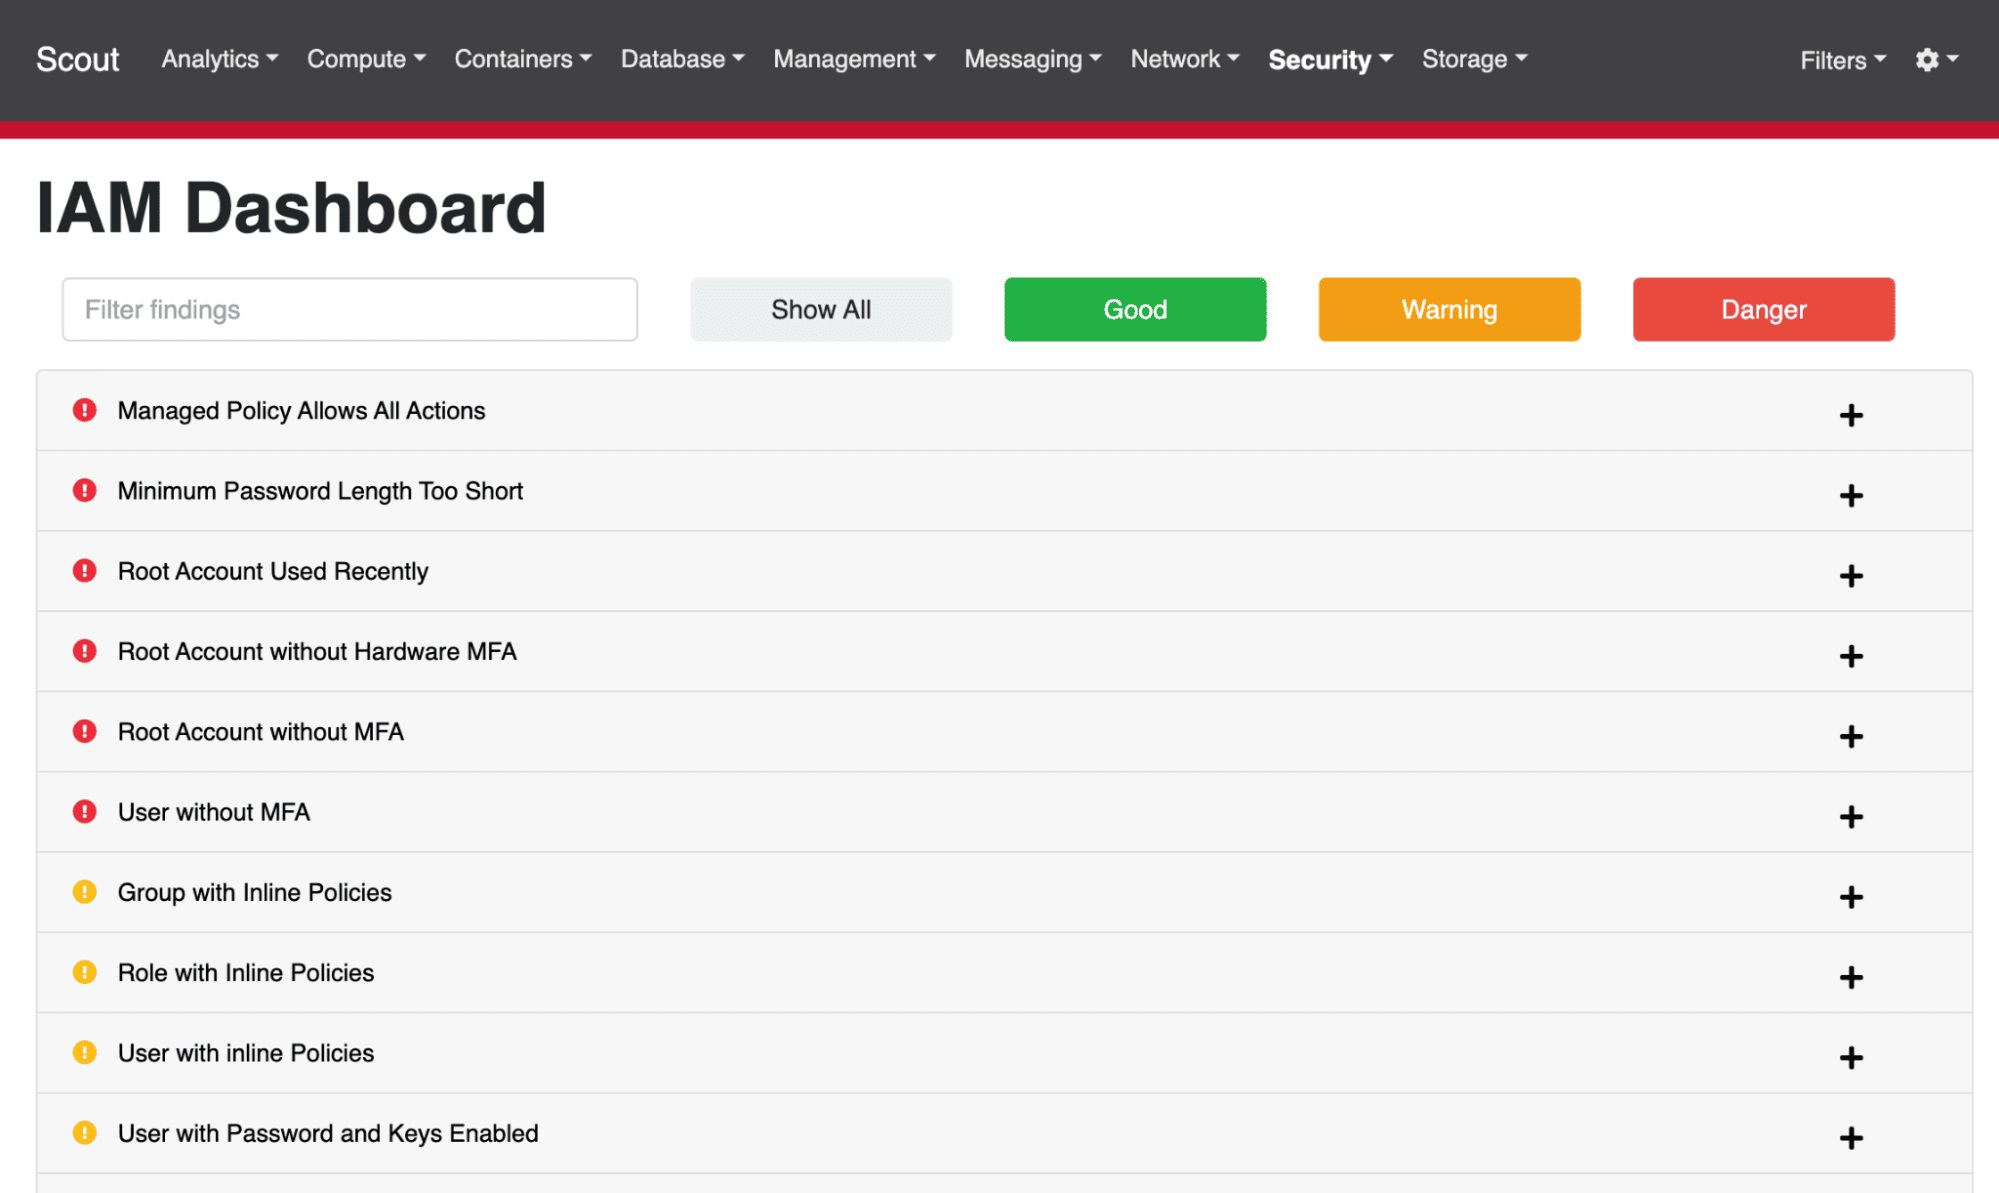
ScoutSuite will build a really nice HTML report for you. It’ll be placed in the directory you specified using the report-dir flag in the command above. Open the HTML file in the root of the report directory in your browser. Click into any of the topic areas to view more details about your configuration. Here’s an example of the IAM results from a misconfigured account:
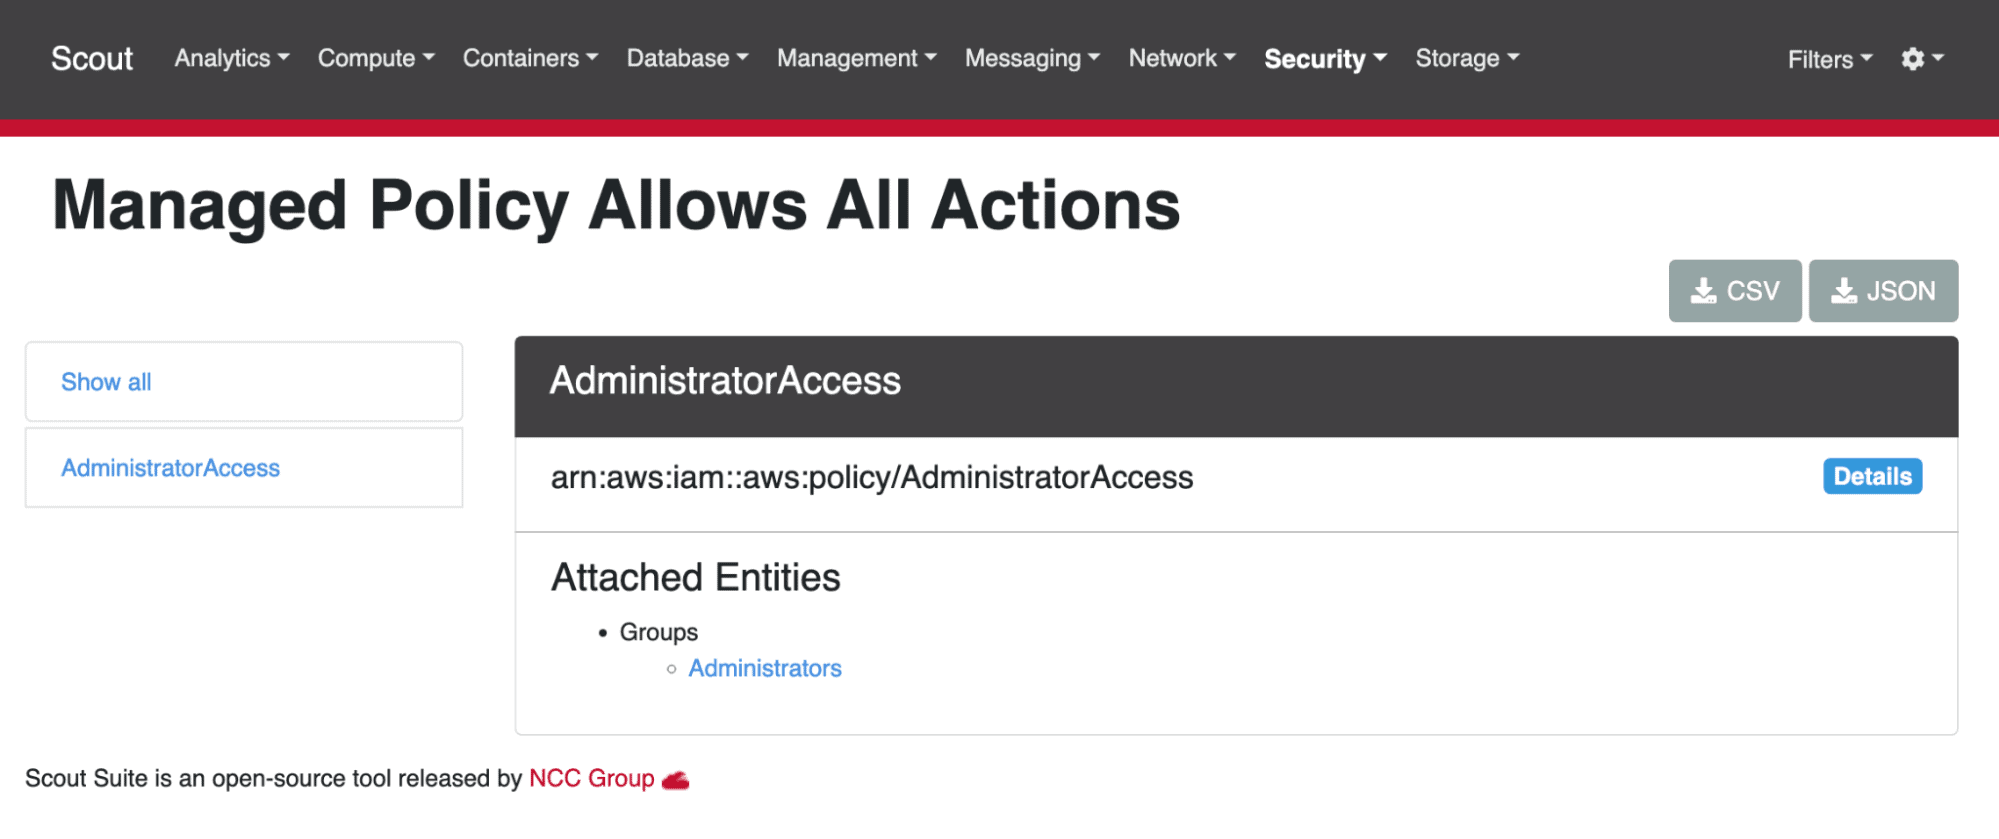
When reviewing the results, you’ll want to verify that some of the findings aren’t red herrings. For example, ScoutSuite spotted a managed policy that allows all actions. When we look at that policy, it’s actually the AdministratorAccess policy, which is attached to the user group Administrators. In this case, we actually want the environment to be configured this way, so nothing has to be fixed.
5. Remediate and Cleanup
After you’re done using the report to patch up any holes in your environment, you might want to either remove the access key from the user account you created in step 1, or delete the account entirely if you don’t plan to conduct additional scans in the future. After all, ScoutSuite will flag the account if its credentials aren’t used for 90 days or more!
I find it useful to scan our AWS environments once a quarter to ensure no new potential vulnerabilities have been introduced over the preceding three months. The first scan is usually the most painful in terms of the amount of work generated, and subsequent scans provide peace of mind more than anything else. When it comes to evaluating your organization’s security posture, peace of mind is a great thing to have.
Loved the article? Hated it? Didn’t even read it?
We’d love to hear from you.