You’ve probably heard of an electric toothbrush, but what about an electric paintbrush? Did you know that you can paint with electricity?
The code I work on each day helps people plan how to handle large amounts of electricity moving through the grid. Some of the equipment involved can typically handle 500kV, or 500,000 volts.
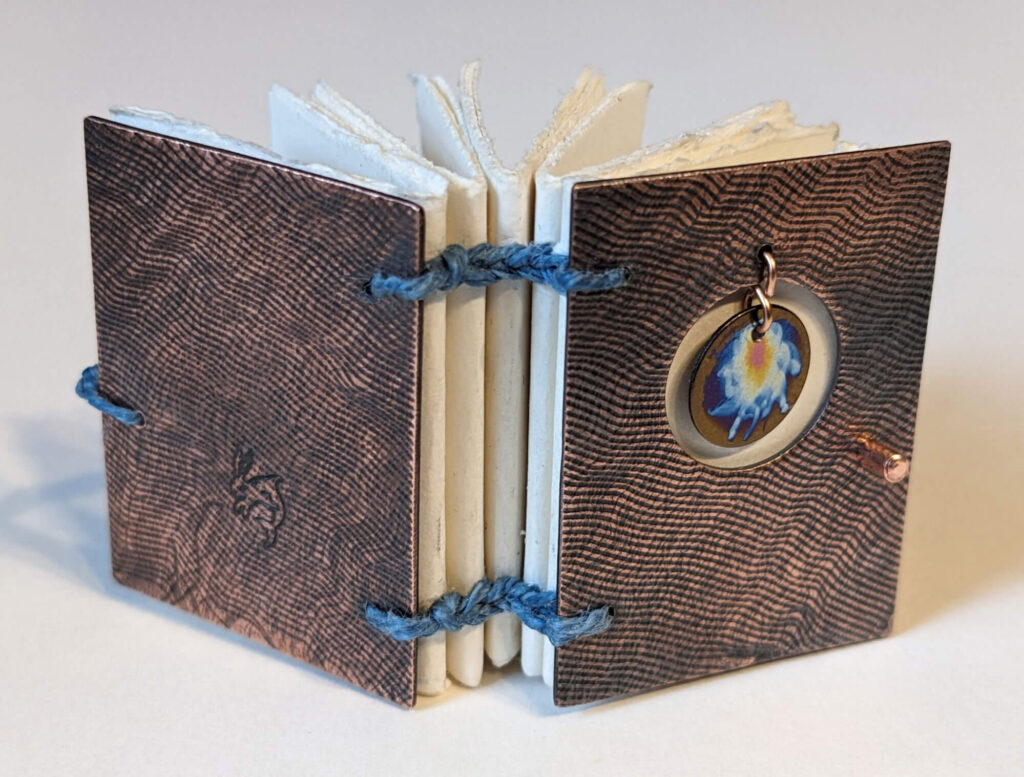
But I’ve had the chance to personally interact with electricity at a much, much smaller scale. Working with 120 volts and below, I’ve created small, brightly colored pieces of metal that I can use in jewelry or bookmaking projects.

Anodizing is a process in which a rainbow of colors can be applied to certain metals using electricity. I’ve had the chance to take several anodizing classes at local art centers. One of the techniques involves using a paintbrush with an electrolyte solution that is connected to an anodizer while adjusting the voltage to change the colors. It’s one of the most fun art processes that I’ve tried.
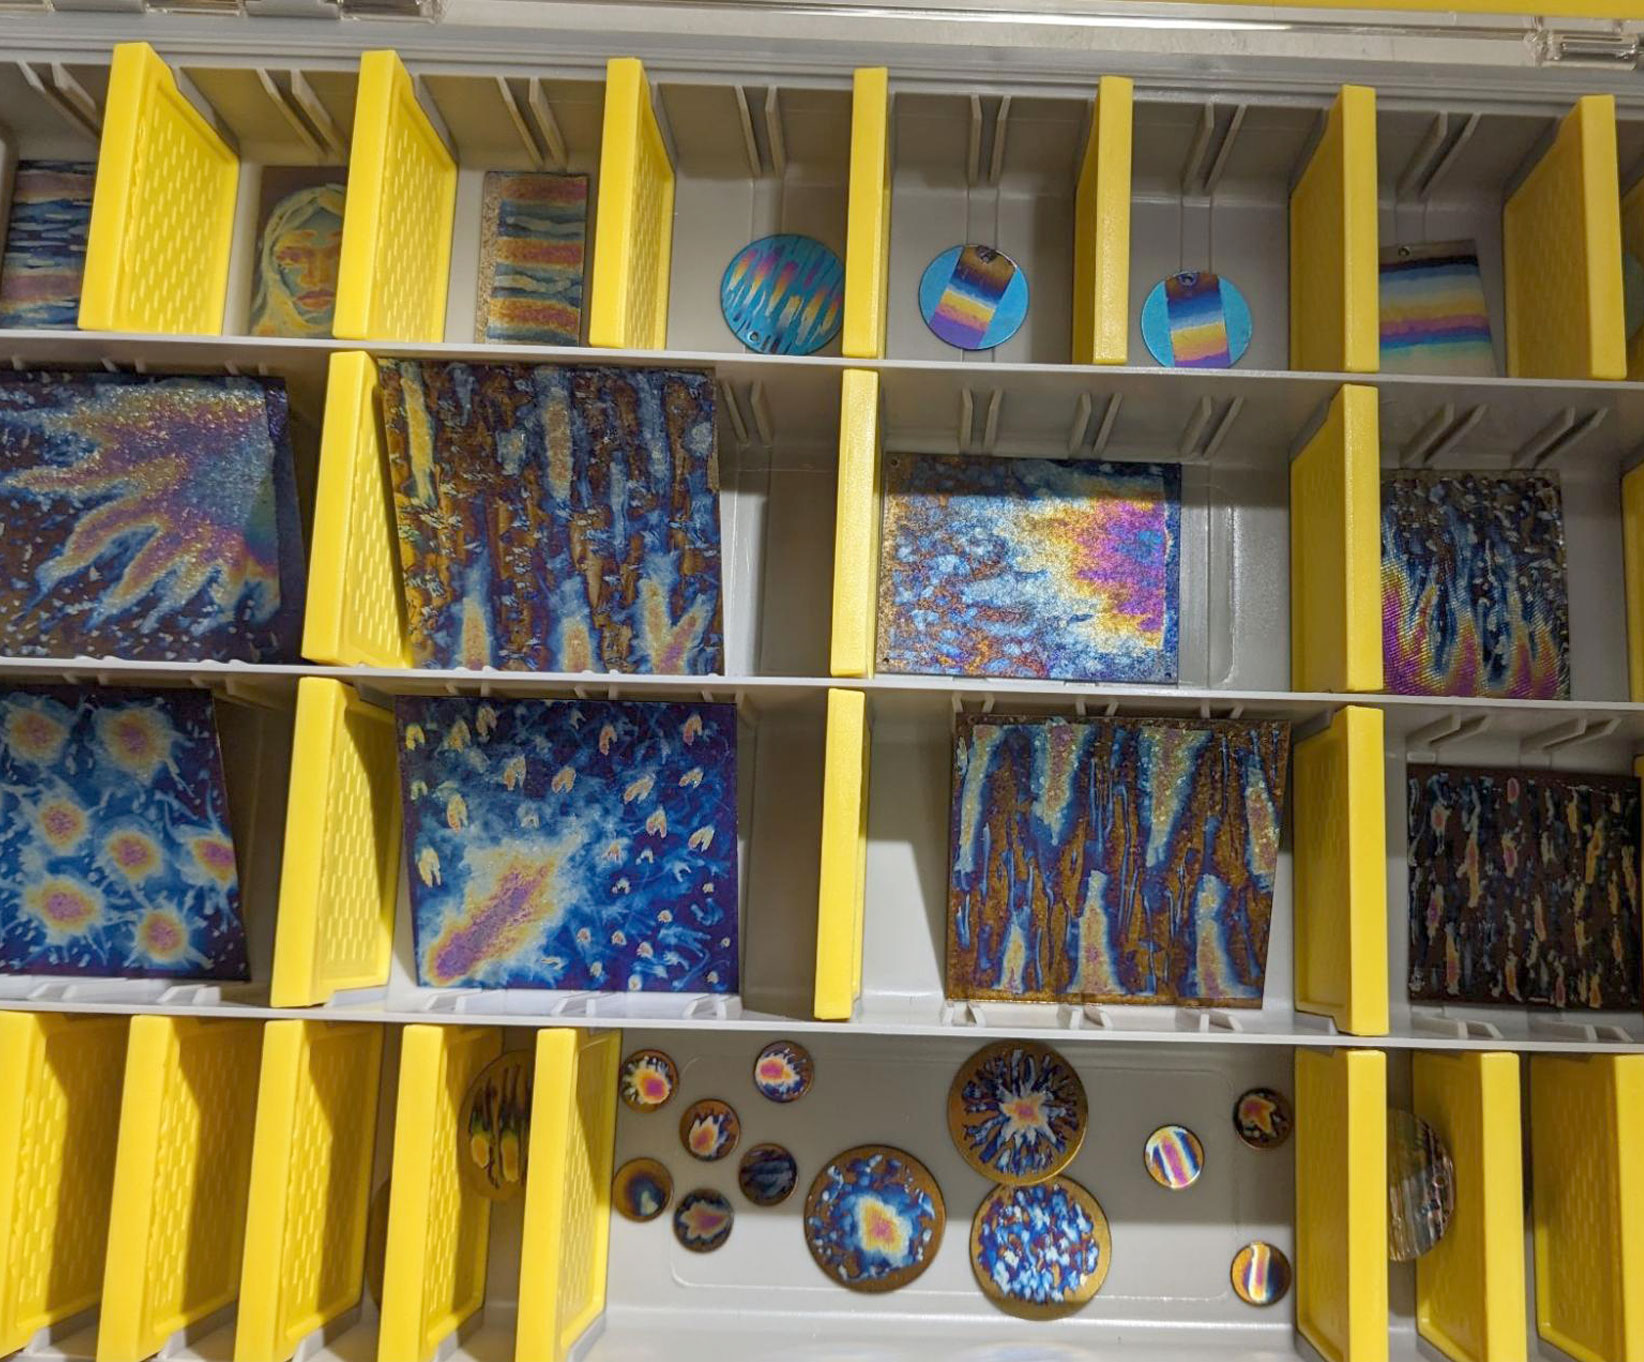
You can get quite a variety of brilliant colors with this technique. Greens can be tricky to achieve, but there are several shades of blue, some yellows and oranges, and a bold magenta. As you raise the voltage, higher-voltage colors will replace lower-voltage colors. But, lower voltages will not affect the higher-voltage colors.
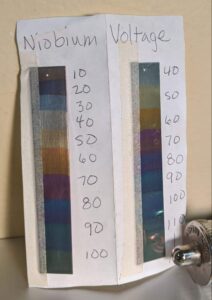
This works because with the different voltages of electricity we are creating different thicknesses of a clear oxide layer on the surface of the metal, which refract and reflect light in such a way that we see bright colors.
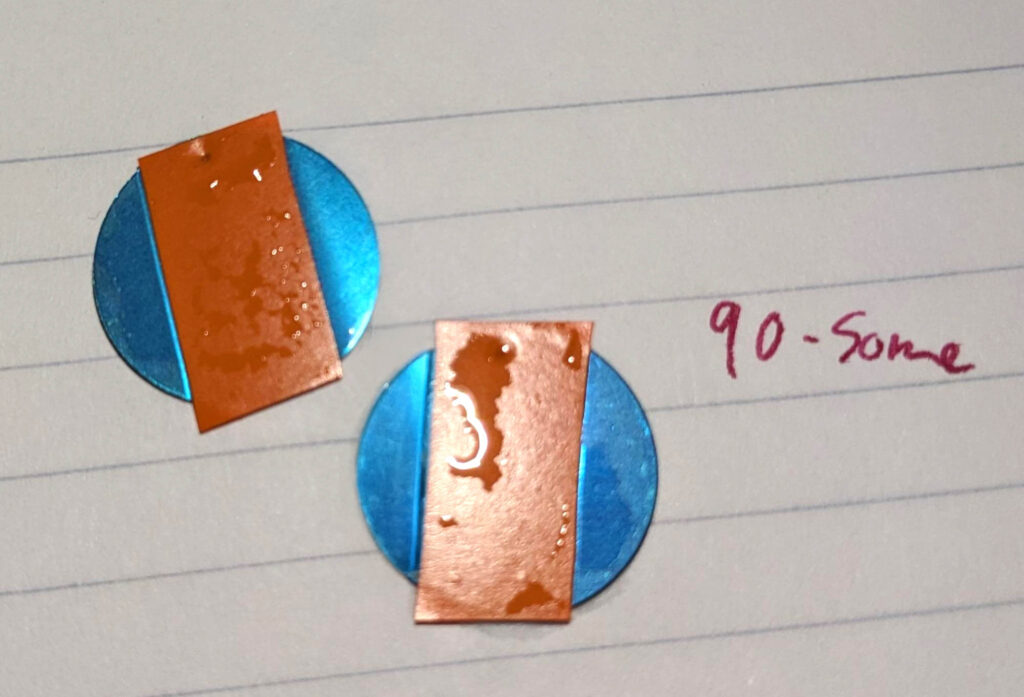
In the classes I’ve taken, we’ve worked with niobium and titanium. Niobium tends to have better color, but is more expensive.
The anodizer we used for the power supply is one that you might find in a piercing studio, if they offer custom colors for titanium jewelry. It is about the size of the old CD player that I had back in college. There is a screen to display the current voltage, and a knob that allows you to move smoothly between voltages.
The negative output from the anodizing machine attaches to the stainless steel cathode, and the positive output (the anode) connects to a variety of attachments. Those are what come into contact with the piece of metal you are working on.
Then there is the electrolyte bath: a glass or plastic bowl of distilled water with some non-phosphate TSP (a detergent). The cathode is placed in the bath behind a protective plastic screen.
Safety is very important. We wore dishwashing gloves and made sure to return the anodizer’s voltage all the way to 0 between uses.
There are a variety of different techniques that can be used. I am familiar with three of them.
The most basic of these is putting one or more pieces of metal in a plastic strainer basket in the electrolyte bath. The attachment is a metal wand with a handle. When you tap each piece of metal in the solution with the wand, the color changes to the current voltage color. This is good for putting a bunch of small components like jump rings or earring hooks in and coloring them at once, as it can be tricky to match colors on pieces that have been anodized separately. I used this technique often for establishing a background color in a low voltage so that I could paint higher-voltage colors later.
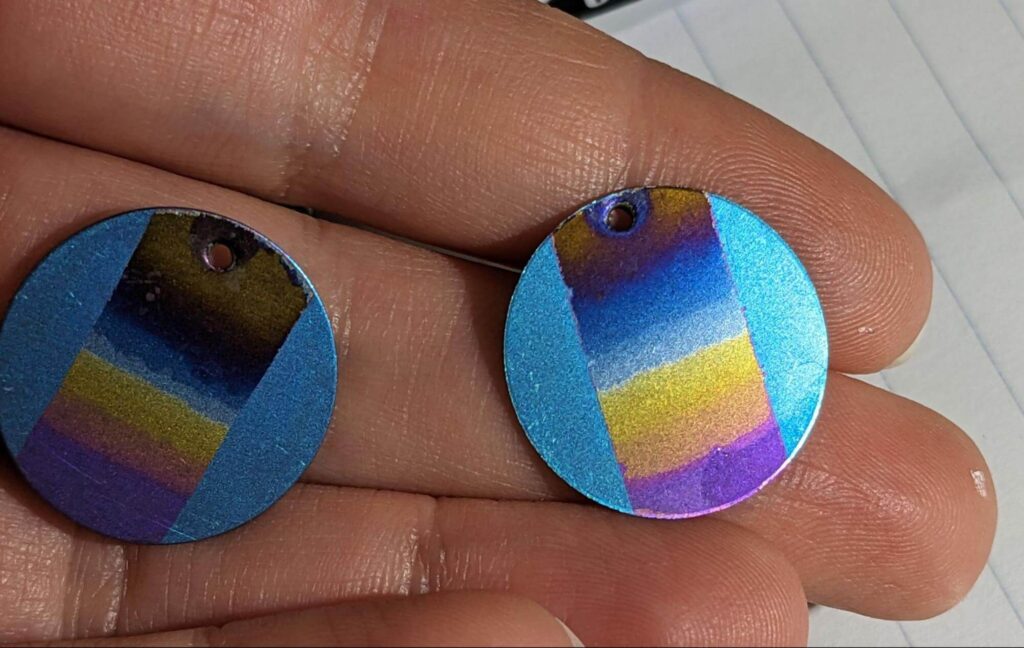
Another technique is when, instead of a wand, the attachment to the power supply is a hook. With the hook in a tiny hole in the metal, you can pull the metal slowly out of the solution as you raise the voltage. You can create stripes (like the sample strips above), or a softer gradient effect depending on how you coordinate moving the metal and adjusting the voltage simultaneously.
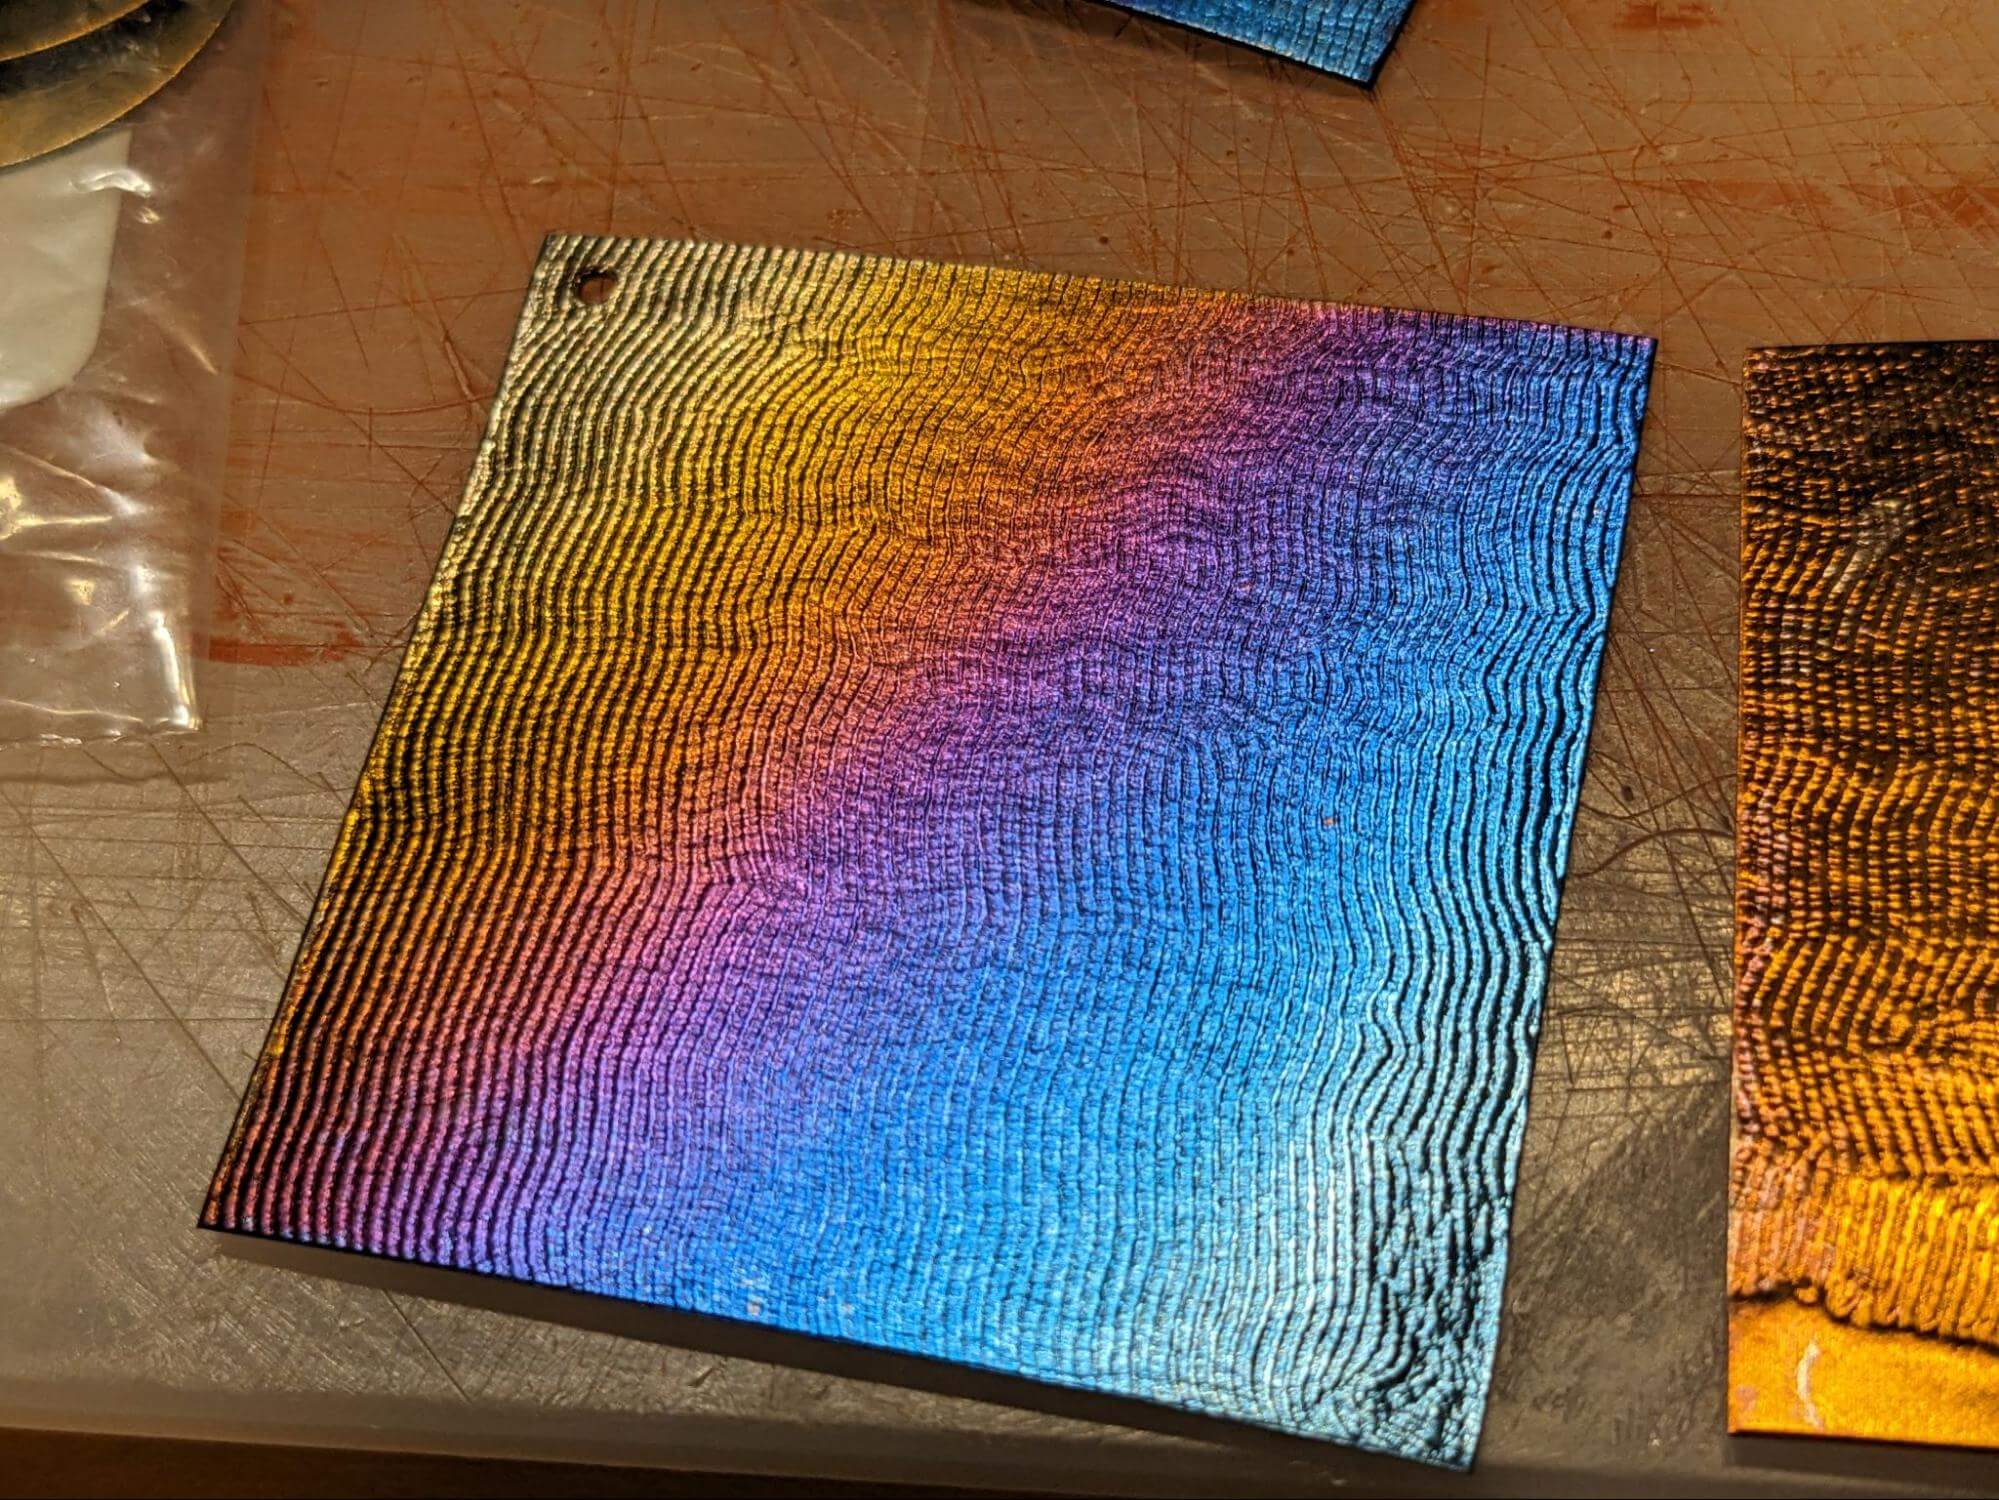
My personal favorite technique is painting. You start by using electrical tape to tape the metal piece down over the cathode. Then you also have a paintbrush attachment, where the wire is connected to the metal ferrule that holds the bristles so that it is electrified. Using tiny amounts of the electrolyte solution, you can paint. Even though no actual pigment is involved, the feel of it is very similar to painting in watercolor. Now in addition to controlling the voltage on the anodizer, you can get different effects depending on how long the brush stays in one place.
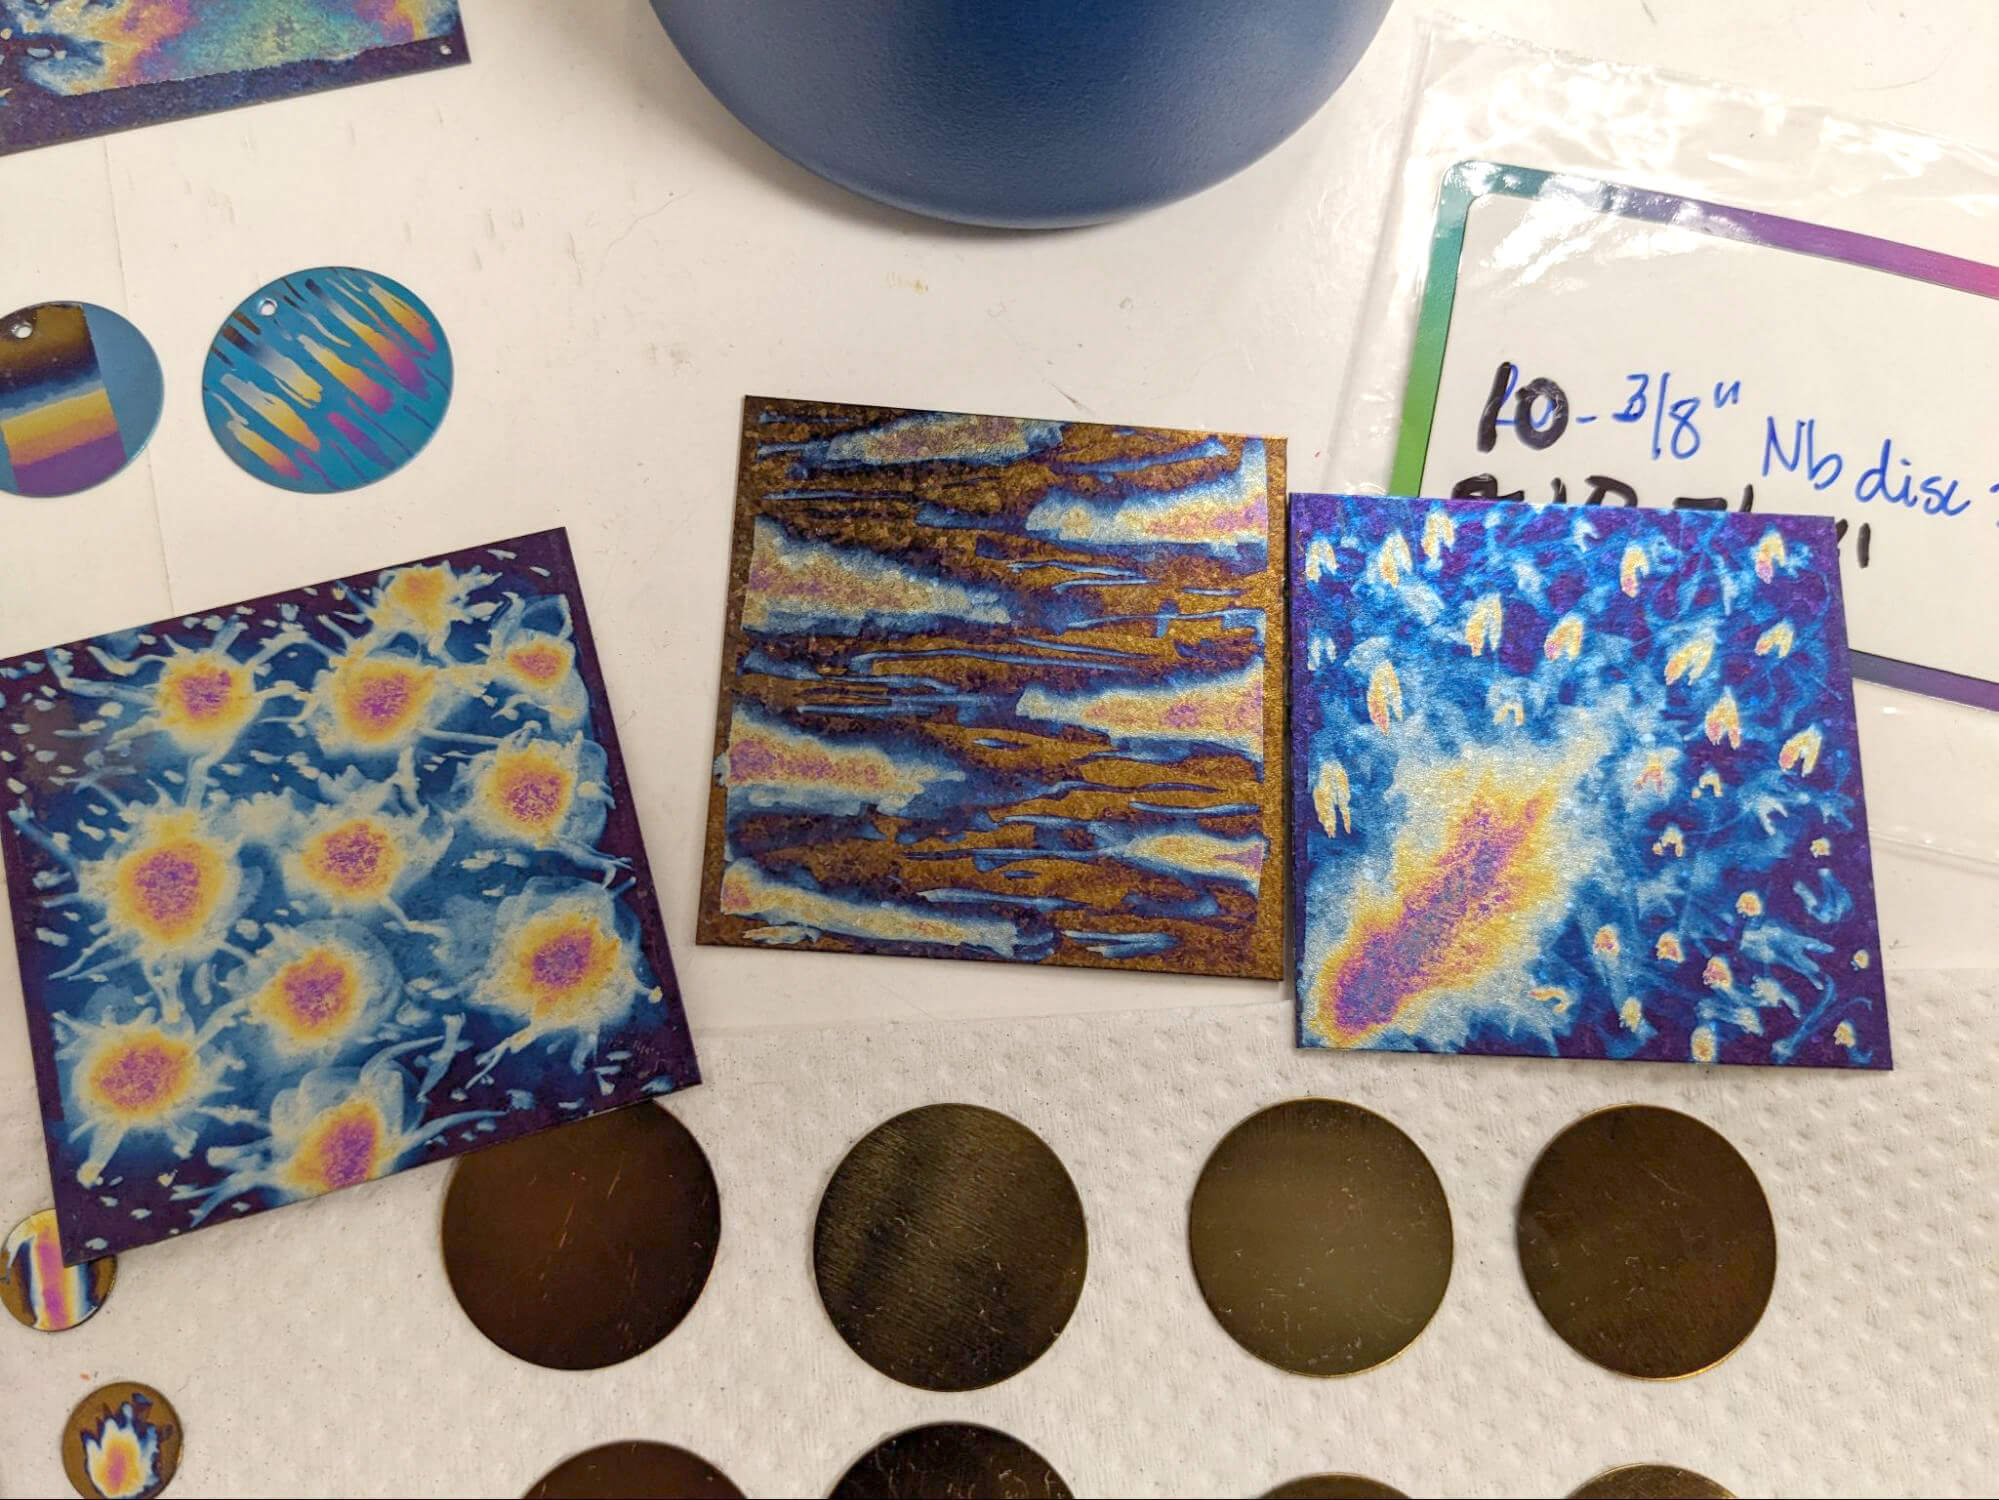
Since the anodizing process affects the surface of the metal, you can combine these techniques with using resist (something that will protect a portion of the surface from being anodized, such as electrical tape or a white-out pen) or sanding off the anodized coating.
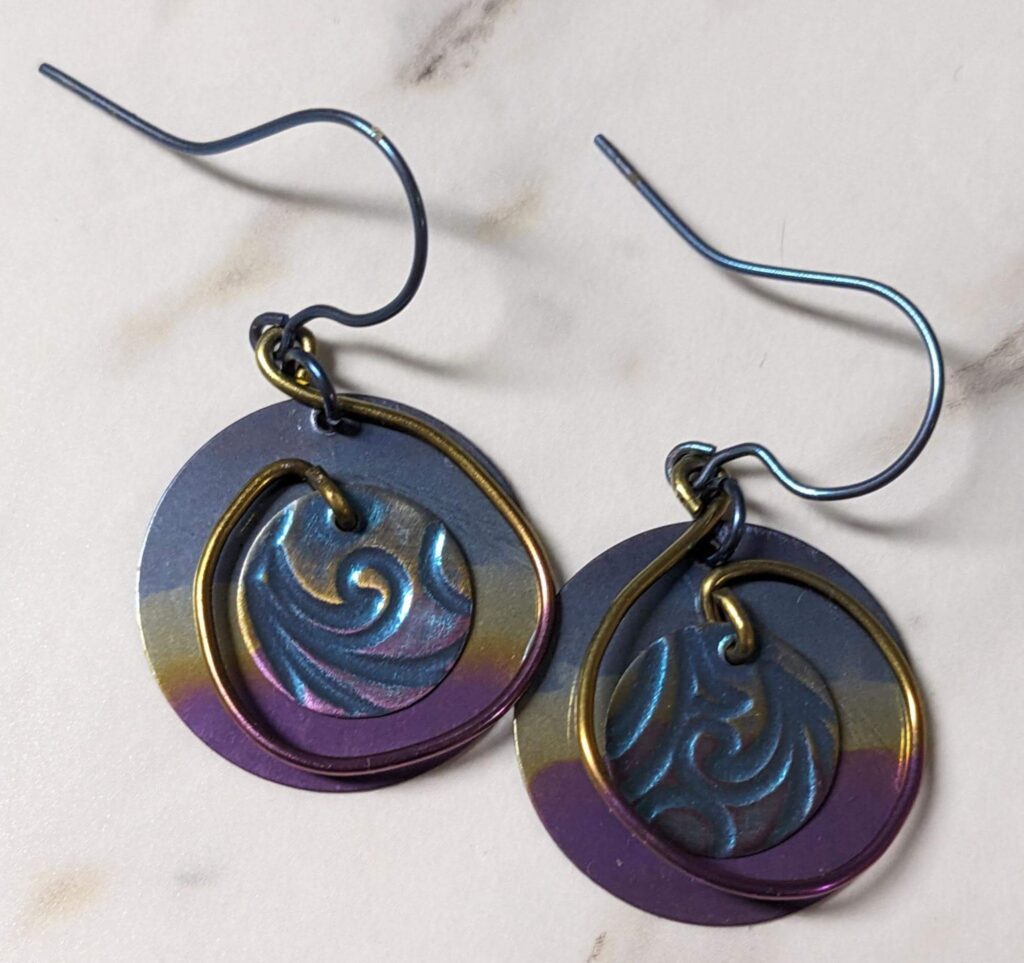
For the earrings shown earlier, I anodized the textured disks to a high-voltage dark blue. Then I sanded the blue off of the flat surface, and created a gradient with lower-voltage colors.
In the following examples, I used different kinds of resist to prevent the metal from being anodized in certain areas. Then after removing the resist, I could come back in with lower-voltage colors.


The possibilities are really endless with these techniques. It’s a really fun process that feels kind of magical, as if you are pulling these brilliant colors out of thin air. Working at such a small scale, it’s easy to get the feeling of instant gratification as you experiment with different ideas.
If this interests you, you may be able to find a class at your local art center. You would likely need to have taken their basic jewelrymaking or metalwork class as a prerequisite.
Electricity powers so much of our world: from lights to life-saving medical equipment to the devices we’re on all the time. And yet I never would have guessed that it could also create such vibrant colors on metal, or that this process is accessible in art studios, not just factories.
References:
- Amy Veatch was my instructor for the classes I took.
- Refreshed my memory on the anodizing process with this short video.
- Old but still relevant video on the science behind anodizing with a bit on how aluminum anodizing (a slightly different process) was used for colorful iPod cases.
Loved the article? Hated it? Didn’t even read it?
We’d love to hear from you.